Welcome, fellow kitchen enthusiast! If you’ve ever wondered what separates a good homemade cookie from a great one, or a dense cake from a light, ethereal one, the secret often lies in one fundamental step. Today, we’re diving deep into How To Properly Cream Butter And Sugar. It sounds simple, but this technique is the bedrock of countless incredible bakes. Think of it less as a chore and more as the magic trick that transforms basic ingredients into something truly special. As your resident hand mixer expert, I’m here to demystify the process and show you how your trusty hand mixer is the perfect tool for the job.
Why Is Creaming Butter and Sugar So Important Anyway?
Before we get our mixers whirring, let’s talk about the “why.” What’s actually happening in that bowl? When you cream butter and sugar, you’re not just mixing them. You’re performing a bit of kitchen science.
The sharp edges of the sugar crystals cut into the solid fat of the butter, creating thousands of microscopic air pockets. This process is called aeration. These tiny air pockets are the key to a light and tender texture. Later, when you add leavening agents like baking powder or soda, those gases will expand inside these pockets, giving your bake its lift and delicate crumb. Skimp on this step, and you’re missing out on the very foundation of a light-textured baked good.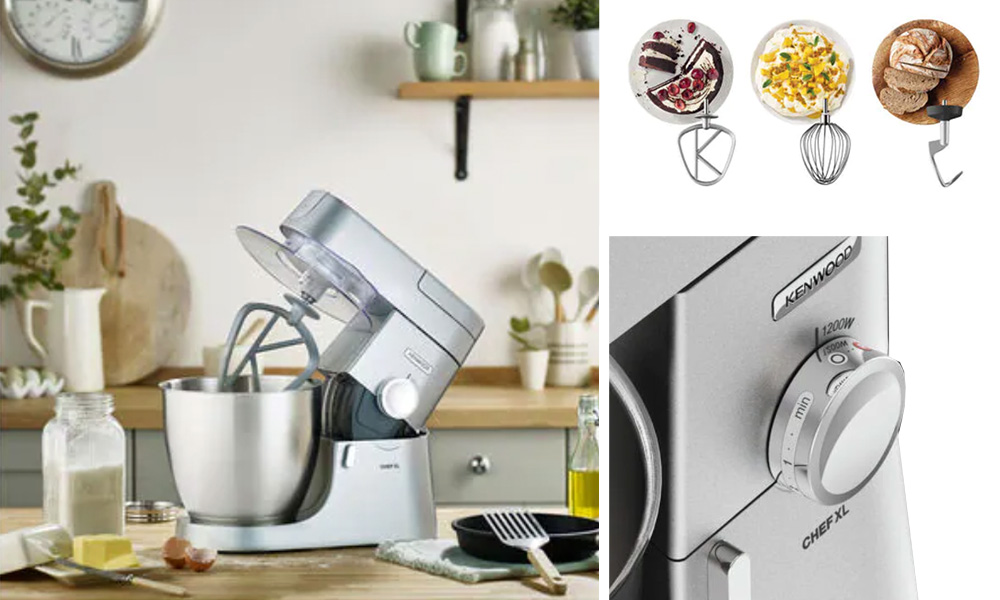
As professional pastry chef Elena Vance always says, “Creaming is not about combining; it’s about building structure. You are building the framework for your cake or cookie before it ever sees the heat of the oven. A weak foundation leads to a weak structure.”
The Right Tools for the Job: Your Hand Mixer
While you can do this by hand with a wooden spoon (and a whole lot of elbow grease), a hand mixer makes the job infinitely faster and more effective. It provides the consistent speed and power needed to create that perfect airy emulsion.
Choosing Your Beaters
For creaming, you’ll want to use the standard flat beaters (the ones that look like twisted wires) that came with your hand mixer. These are designed to cut through the butter and incorporate air efficiently. Avoid the whisk attachment for this step; it’s better suited for lighter tasks like whipping egg whites or cream.
The Importance of Speed Settings
This isn’t a race to the finish line. The key is to start slow and build up.
- Low Speed: Use this to initially break up the butter and start incorporating the sugar without flinging it all over your kitchen.
- Medium to Medium-High Speed: This is your sweet spot. This is where the real aeration happens. The sustained, powerful whipping action is what creates those crucial air pockets.
The Step-by-Step Guide: How to Properly Cream Butter and Sugar
Ready to achieve creaming perfection? Grab your hand mixer, a large mixing bowl, and let’s get started.
- Start with Softened, Room Temperature Butter
This is non-negotiable. The ideal temperature for butter is around 65-68°F (18-20°C). It should be pliable enough that you can press an indentation into it easily with your finger, but not so soft that it’s greasy or melting. Cold butter won’t be able to form air pockets, and melted butter can’t hold them at all, leading to a greasy, flat result. - Begin Beating the Butter Alone
Before you even think about adding sugar, place your softened butter in the bowl and beat it on low-medium speed for about 30-60 seconds. This “wakes up” the butter, making it smooth, creamy, and ready to accept the sugar. - Gradually Add the Sugar
Don’t just dump all the sugar in at once. With the mixer on low speed, slowly stream in the sugar. This allows the sugar crystals to incorporate evenly without deflating the butter. Once it’s all in, you can start to increase the speed. - Increase the Speed and Set a Timer
Now it’s time for the main event. Crank your hand mixer up to a medium-high speed and let it run. This is where patience pays off. You’ll need to beat the mixture for a solid 3 to 5 minutes. Don’t just go by the clock, though; use your eyes. You’re looking for a dramatic transformation:- The mixture will become visibly lighter in color, going from a buttery yellow to a pale, off-white.
- The volume will increase significantly as it fills with air.
- The texture will change from grainy to light, fluffy, and almost like a thick frosting.
- Scrape Down the Bowl. Often.
This is the single most important tip I can give you. Stop the mixer every minute or so and use a flexible spatula to scrape down the sides and bottom of the bowl. Butter and sugar love to hide out on the edges, escaping the beaters. If you don’t scrape them back into the mix, you’ll have unincorporated streaks of dense butter in your final dough, which leads to an uneven texture.
Common Mistakes to Avoid (And How to Fix Them)
Learning how to properly cream butter and sugar also means knowing what not to do. Here are some common pitfalls:
- The Mistake: Using Cold Butter.
- The Result: A lumpy mixture, dense and heavy baked goods. The sugar can’t cut into the hard fat.
- The Fix: If your butter is too cold, cut it into small cubes to help it soften faster. Or, try the trick of placing a warm (not hot!) glass over the stick of butter for a few minutes.
- The Mistake: Using Melted or Oily Butter.
- The Result: Greasy, flat cookies that spread too much. The liquid fat can’t hold air.
- The Fix: Unfortunately, there’s no going back from melted butter. You’ll have to chill it back to a solid state and start the softening process over.
- The Mistake: Not Creaming Long Enough (Undermixing).
- The Result: A grainy texture, dense crumb, and cookies that don’t spread enough.
- The Fix: Just keep mixing! Set that timer for at least 3 minutes and watch for the visual cues of a pale and fluffy mixture.
- The Mistake: Forgetting to Scrape the Bowl.
- The Result: Pockets of uncreamed butter, leading to an inconsistent texture in the final product.
- The Fix: Make it a habit. Mixer off, scrape, mixer on. Repeat.
Hand Mixer vs. Stand Mixer for Creaming
So, do you need a big, bulky stand mixer for this? Absolutely not! A hand mixer gives you more control. You can move it around the bowl to target any stubborn bits of butter and ensure everything is perfectly incorporated. While a stand mixer offers hands-free convenience, a good hand mixer gives you the power and maneuverability to achieve a flawless creamed mixture every single time. It’s the perfect, accessible tool for bakers of all levels.
Frequently Asked Questions
How do I know when my butter and sugar are properly creamed?
Look for three key visual signs: the mixture will be pale ivory or off-white in color, it will have visibly increased in volume, and the texture will be light and fluffy, similar to a thick frosting. When you rub a bit between your fingers, it should feel much less grainy.
Can I use brown sugar for the creaming method?
Yes, absolutely! Brown sugar has more moisture, so the final creamed mixture might look a bit darker and less voluminous than with white sugar, but the aeration process is the same. Many cookie recipes call for a combination of both for the perfect texture.
What speed should I use on my hand mixer?
Start on a low speed to combine the ingredients without making a mess. Once the sugar is mostly incorporated, increase the speed to medium-high for the main 3-5 minute creaming process to effectively incorporate air.
Can I over-cream butter and sugar?
It is possible, but much harder to do with a hand mixer than a powerful stand mixer. If you cream for too long (think 8-10+ minutes), the mixture can start to get warm, causing the emulsion to break and look curdled as the air pockets collapse. Stick to that 3-5 minute window for best results.
What if I don’t have a hand mixer?
You can do it the old-fashioned way with a sturdy bowl and a wooden spoon or a firm whisk. It will take a lot more time and arm strength—up to 15-20 minutes of vigorous mixing—to achieve a similar result. A hand mixer is a worthy investment to save you time and effort.
Bringing It All Together
Mastering how to properly cream butter and sugar is a true level-up for any home baker. It’s a simple technique that, when done correctly, pays huge dividends in the texture and quality of your creations. Remember the keys to success: use room temperature butter, take your time (3-5 minutes!), and scrape down that bowl religiously. Your trusty hand mixer is the perfect partner in this process, providing the power and control you need to build that perfect, airy foundation for your next batch of delicious cookies, cakes, or scones.
Now, go forth and cream with confidence! We’d love to hear about your baking triumphs in the comments below.