Is your beloved hand mixer starting to lag, or are your batters not as smooth as they once were? Don’t toss out that trusty appliance just yet! Often, the culprit isn’t the motor but the unsung heroes of your baking adventures: the beaters. Over time, even the most durable beaters can wear down, bend, or rust, compromising your mixer’s performance. Replacing them is a straightforward and cost-effective way to breathe new life into your old mixer, ensuring it continues to whip, cream, and mix with precision for years to come. This guide will walk you through everything you need to know about replacing hand mixer beaters, especially for those classic, older models.
What is a Hand Mixer and Why Do You Need One?
|
Our Picks for the Best Hand mixer in 2026
As an Amazon Associate I earn from qualifying purchases.
|
||
| Num | Product | Action |
|---|---|---|
| 1 | Hamilton Beach 6-Speed Electric Hand Mixer with Whisk, Traditional Beaters, Snap-On Storage Case, 250 Watts, White |

|
| 2 | KitchenAid 5-Speed Ultra Power Hand Mixer - KHM512, Contour Silver |
|
| 3 | OVENTE 5-Speed Electric Hand Mixer with Stainless Steel Mixing Whisk, Snap-On Storage Case, Portable & Lightweight 150W Motor, Compact Handheld Mixer for Baking, Blending or Cooking, Red HM151R |
|
| 4 | KitchenAid 5-Speed Ultra Power Hand Mixer |
|
| 5 | OVENTE 5-Speed Corded Electric Hand Mixer with Stainless Steel Whisks, Compact Portable Design with Snap-On Storage Case,150W Lightweight Handheld Mixer for Baking & Cooking, Black HM151B |
|
| 6 | KitchenAid 5 Ultra Power Speed Hand Mixer - KHM512, Aqua Sky |
|
| 7 | Maestri House Rechargeable Milk Frother with Stand, LunaFro Handheld Electric Foam Maker Waterproof Detachable Stainless Steel Whisk Drink Mixer Foamer for Lattes, Cappuccino |
|
| 8 | 600W Electric Hand Mixer Kitchen Handheld Mixer 10 Speed Powerful with Turbo for Baking Cake Lightweight & Personal Electric Mixer with Egg Baking Beaters Dough Hooks, Whipping Mixing Cookies |
|
| 9 | Wellness Extract Multi-Speed Rechargeable Electric Milk Frother, Li-ion Battery Powered – Certified Safe, Ideal for Coffee, Matcha, Protein & Colostrum |
|
| 10 | OVENTE 5-Speed Corded Electric Hand Mixer with Stainless Steel Whisks, Compact Portable Design with Snap-On Storage Case,150W Lightweight Handheld Mixer for Baking & Cooking, White HM151W |
|
A hand mixer is a small, portable electric appliance featuring rotating beaters that quickly and efficiently combine ingredients. It’s an indispensable tool in any kitchen, particularly for baking and various cooking tasks. Unlike bulky stand mixers, hand mixers offer flexibility and ease of use for smaller batches or when you need to mix directly in a bowl. Their primary function is to aerate, blend, and emulsify ingredients, transforming raw components into smooth batters, fluffy meringues, or perfectly whipped cream. From mixing cake batter and kneading light doughs to whipping egg whites and creating frosting, a hand mixer simplifies many culinary processes, saving you time and effort compared to manual mixing.
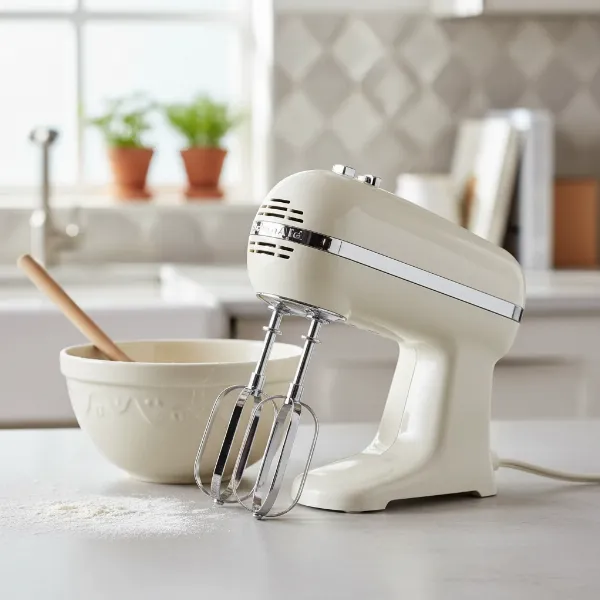 Classic white hand mixer with beaters, ready for baking tasks in a home kitchen.
When to Replace Your Hand Mixer Beaters
Knowing when to replace your hand mixer beaters is crucial for maintaining optimal performance and food safety. Keep an eye out for several tell-tale signs:
- Bending or Deformation: If your beaters appear bent or warped, even slightly, they won’t make proper contact with ingredients, leading to uneven mixing and potential strain on your mixer’s motor.
- Rust or Corrosion: The presence of rust, especially where chrome plating has worn off, is a clear indicator that beaters need replacing. Rust can transfer to your food and is unhygienic.
- Looseness or Wobbling: Beaters that feel loose or wobble excessively when inserted into the mixer indicate a poor fit or internal wear, which can hinder efficient mixing and create vibrations.
- Inefficient Mixing: If your mixer struggles to combine ingredients, leaves lumps, or takes significantly longer than usual to achieve the desired consistency, worn beaters are likely to blame.
Your mixer’s motor is often built to last, far outliving its attachments. Replacing worn beaters ensures you get the most out of your existing appliance without needing to invest in a whole new unit.
Understanding Different Types of Hand Mixer Beaters
Hand mixer beaters come in various designs, each suited for specific mixing tasks. The most common types include:
- Wire Beaters (Standard Beaters): These are the most versatile and come standard with most hand mixers. They are excellent for whipping air into egg whites, cream, and light batters.
- Dough Hooks: Designed for kneading light to medium-thick doughs, like bread or pizza dough, preventing them from wrapping around the beaters.
- Whisker Attachments: Similar to wire beaters but often smaller and more delicate, ideal for aerating small quantities or creating light sauces.
The material of your beaters also plays a significant role in their durability and performance. Many older mixers came with chrome-plated steel beaters, which can be prone to chipping and rusting over time. Modern replacements often feature stainless steel, which is highly resistant to rust, corrosion, and bending, offering superior longevity and hygiene. It’s always advisable to choose stainless steel replacements when available. Some beaters have a unique keyed shaft that only fits one way, while others are symmetrical. Pay close attention to this detail when selecting replacements.
Factors to Consider When Finding Replacement Beaters for Older Models
Finding the right replacement beaters for an older hand mixer can be a bit more challenging than for newer models, but it’s certainly doable. Here are the key factors to consider:
- Mixer Model Number: This is the most critical piece of information. The model number is usually found on a sticker on the underside or back of your mixer. With this number, you can search for exact compatible parts.
- Original Beater Design: Carefully examine your old beaters. Note the shape of the shaft that inserts into the mixer (e.g., round, flat sides, keyed). Also, observe the overall design of the beater itself. Photos can be invaluable here.
- Material Preference: As mentioned, stainless steel is often a superior choice for durability and hygiene over original plastic-coated or chrome-plated beaters.
- Availability: Genuine manufacturer parts for very old models might be scarce. You may need to look into third-party manufacturers that produce compatible accessories. Online marketplaces and specialty appliance parts stores are good places to start. Forums, like those on Reddit for brands like KitchenAid, can also be helpful for finding parts for vintage mixers.
- Compatibility Check: Always double-check product descriptions for compatibility with your mixer’s brand and model number. If purchasing online, reviews from other users with similar older mixers can provide valuable insights.
Step-by-Step Guide: Replacing Your Old Mixer’s Beaters
Replacing your mixer beaters is a simple process that most home cooks can easily accomplish.
- Safety First: Unplug Your Mixer. Before attempting any removal or insertion, always ensure your hand mixer is unplugged from the power outlet. This prevents accidental activation and potential injury.
- Remove the Old Beaters:
- Locate the Eject Button/Release Tabs: Most hand mixers have a dedicated eject button, usually located near where the beaters insert. Press and hold this button firmly.
- Pull Out the Beaters: While holding the eject button, grip each old beater firmly near its base and pull straight out. You should feel or hear a click as it disengages.
- For Stand Mixers (e.g., KitchenAid): Some stand mixers, including older KitchenAid models, might require a slightly different method. You typically push the beater up against a spring mechanism and then twist it out of its locked position.
- If No Button or Stuck Beater: For very old mixers without a clear eject button, or if a beater is stuck, a firm, straight pull might be necessary. Avoid twisting if it’s not designed for it, as this could damage the mixer.
- Insert the New Beaters:
- Identify Correct Slots: On most hand mixers, the two slots for the beaters are slightly different in shape (often one is larger or has a distinct keyway). Similarly, the shafts of the beaters themselves will have corresponding shapes (e.g., one round, one with a flat edge). Ensure you match the correct beater to the correct slot.
- Align and Push: Align the flat sides of the new beater’s shaft with the corresponding slots inside the mixer head. Push the new beater firmly into place until you hear or feel a distinct “click,” indicating it’s securely locked. Do not force it sideways, as this can damage the mechanism.
- For Stand Mixers: If replacing a stand mixer beater, align the notch on the beater’s shaft with the pin in the mixer head, push up against the spring, and twist until it locks into place.
- Test Rotation: Once both new beaters are in place, plug in your mixer and briefly turn it on at the lowest speed (without ingredients). Confirm that both beaters rotate smoothly, without wobbling or making unusual noises.
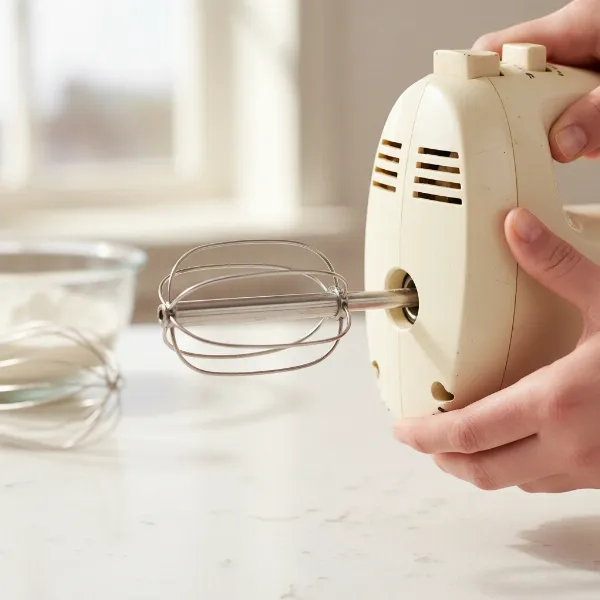 Hand inserting a new stainless steel beater into an older model electric hand mixer.
Maintaining Your Hand Mixer Beaters for Longevity
Proper care can significantly extend the life of your mixer beaters and ensure your mixer performs optimally:
- Immediate Cleaning: Wash beaters immediately after use to prevent food from drying and sticking. Most stainless steel beaters are dishwasher safe, but always check the manufacturer’s instructions. If hand washing, use warm, soapy water and a brush to remove all residue.
- Thorough Drying: Ensure beaters are completely dry before storing them to prevent rust, especially for chrome-plated or older models.
- Proper Storage: Store beaters in a drawer or container where they won’t get bent or damaged by other utensils. Avoid simply tossing them into a crowded drawer where they can get snagged or dropped.
- Avoid Harsh Abrasives: When cleaning, avoid abrasive scrubbers or harsh chemicals that can scratch or damage the beater’s surface.
Where to Purchase Replacement Beaters
Finding the right replacement beaters often involves knowing where to look:
- Manufacturer’s Website: Start with the original manufacturer’s website. Even if your mixer is old, they might still stock parts or direct you to authorized retailers.
- Online Retailers: Websites like Amazon, AliExpress, and other large online marketplaces offer a wide selection of generic and brand-specific replacement beaters. Be sure to filter by brand and check product compatibility.
- Specialty Appliance Parts Stores: Dedicated appliance parts websites often have extensive catalogs and can help you track down obscure or older parts.
- Local Appliance Repair Shops: Sometimes, a local repair shop might have old stock or be able to order specific parts for you.
- Check Reviews and Ratings: When buying from third-party sellers, always read customer reviews to ensure the replacement beaters are high quality and truly compatible with your mixer.
Buying Guide: Key Takeaways for Beater Replacement
Replacing your hand mixer beaters is a smart way to maximize the lifespan of your appliance. Here’s a quick recap of essential considerations:
- Identify Your Mixer: Know your exact model number and the type of beaters it uses.
- Prioritize Material: Opt for durable stainless steel beaters for longevity and hygiene.
- Check Compatibility: Ensure the replacement beaters are specifically designed or universally compatible with your mixer.
- Follow Safety Protocols: Always unplug your mixer before handling beaters.
- Maintain Regularly: Clean and store beaters properly to prevent premature wear.
“Don’t underestimate the impact of good beaters on your baking results. A fresh set can revive even the oldest mixer, making your culinary tasks smoother and more enjoyable.”
Conclusion
Your old hand mixer has likely been a reliable workhorse in your kitchen, enduring countless batches of cookies, cakes, and whipped delights. When its performance begins to wane, often the simple solution lies in replacing its beaters. This small upgrade can make a significant difference, restoring your mixer to its former glory and saving you the expense of a brand new appliance. With the right knowledge and a few simple steps, you can easily select, install, and maintain new beaters, ensuring your cherished mixer continues to deliver delicious results for many more years to come. So, why not give your old mixer the refresh it deserves and get back to creating culinary magic?
Frequently Asked Questions
Can I use universal beaters with my old hand mixer?
While some “universal” beaters claim broad compatibility, it’s crucial to compare their shaft shape and size to your old beaters and mixer slots. Mismatched beaters can lead to inefficient mixing, damage to your mixer, or beaters falling out during use. Always prioritize beaters designed for your specific mixer model or those explicitly listed as compatible.
How often should I replace my mixer beaters?
There’s no fixed timeline for replacing beaters. It depends on usage frequency, care, and material. Replace them immediately if you notice bending, rust, looseness, or if your mixer is no longer mixing efficiently. Regular inspection is key to determining when a replacement is needed.
What should I do if my mixer beater is stuck?
First, ensure the mixer is unplugged. Try applying a small amount of cooking oil or a food-safe lubricant to the base of the beater shaft where it enters the mixer. Let it sit for a few minutes, then try wiggling and pulling it out firmly. If it’s a stand mixer, ensure you are using the correct “push up and twist” motion. Avoid excessive force, which could damage the mixer.
Are stainless steel beaters better than chrome-plated ones?
Generally, yes. Stainless steel beaters are more durable, resistant to rust and corrosion, and typically last longer than chrome-plated alternatives. Chrome plating can chip or wear off over time, exposing the underlying metal to rust. Stainless steel provides a more hygienic and long-lasting solution for your mixing needs.