Let’s be honest, we’ve all been there. You’re halfway through a recipe for the fluffiest birthday cake imaginable, your arm is aching from whisking, and the batter still looks… questionable. This is the moment you realize you need a trusty sidekick. Finding the Best Budget Hand Mixer can feel like searching for a needle in a haystack, but it’s the single tool that can transform your kitchen game without emptying your wallet. It’s about working smarter, not harder, and getting those perfect, lump-free results every single time.
A Quick Trip Down Memory Lane: The Humble Hand Mixer
Before we dive into the nitty-gritty, let’s appreciate this little workhorse. The electric hand mixer wasn’t born in a high-tech lab; it evolved from manual egg beaters in the early 20th century. Companies like Sunbeam and Hamilton Beach pioneered these devices, liberating home bakers from endless manual labor. What started as a simple tool to whip eggs has become an indispensable gadget for everything from cookie dough to mashed potatoes. It’s a true testament to simple, effective design.
What Really Matters When Choosing the Best Budget Hand Mixer?
When you’re on a budget, every feature counts. It’s not about finding a mixer with a million bells and whistles; it’s about finding one that excels at the core tasks. Here’s what you should actually focus on.
How Much Power Do You Really Need?
The wattage of a hand mixer is a good indicator of its motor’s strength. For a budget-friendly option, look for a mixer in the 200 to 250-watt range. This is the sweet spot—powerful enough to handle thick cookie dough without struggling, but not so overpowered that it’s bulky or unnecessarily expensive.
As a rule of thumb, a higher wattage means the motor is less likely to overheat when tackling tougher jobs. Think of it like a car engine; you want enough power to get up the hill without straining.
It’s All About Control: Speeds and Soft Start
More speeds aren’t always better. What’s crucial is having a good range of speeds.
- Low Speed (Slow Start): This is non-negotiable. A true low speed prevents flour and cocoa powder from redecorating your kitchen walls. A “soft start” feature, which gradually brings the beaters up to the selected speed, is a game-changer.
- Medium Speeds: Perfect for general mixing, like creaming butter and sugar or mixing cake batters.
- High Speed (Turbo Boost): You’ll want a powerful high setting for whipping egg whites into stiff peaks or making fluffy whipped cream in a flash.
The Attachments: Your Mixing Arsenal
Even the best budget hand mixer should come with the essentials. Don’t get distracted by fancy, single-use attachments you’ll never touch.
- Traditional Beaters: These are your go-to for 90% of tasks, from cakes and cookies to frostings. Look for sturdy stainless steel construction.
- Whisk Attachment: A single, large balloon whisk is fantastic for aerating ingredients. It incorporates more air than traditional beaters, making it ideal for meringues and whipped cream.
- Dough Hooks: While a hand mixer won’t replace a stand mixer for serious bread making, dough hooks are surprisingly capable of kneading small batches of soft doughs, like for dinner rolls or pizza.
|
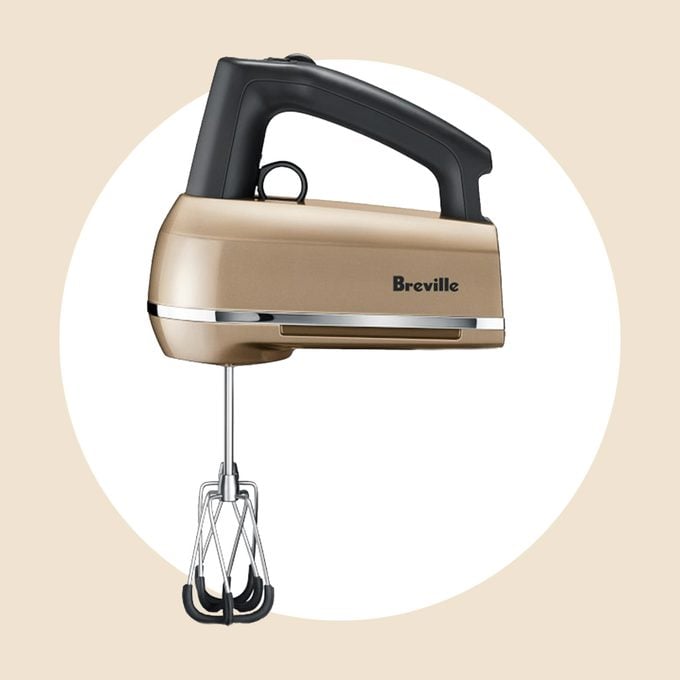
Our Picks for the Best Hand Mixer in 2025
As an Amazon Associate, we earn from qualifying purchases.
|
||
| Num | Product | Action |
|---|---|---|
| 1 | Hand Mixer Electric Mixing Bowls Set, 5 Speeds Handheld Mixer with 4 Nesting Stainless Steel Mixing Bowl, Measuring Cups Spoons 200W Kitchen Blender Whisk Beater Baking Supplies For Beginner |

|
| 2 | Proctor Silex Easy Mix 5-Speed Electric Hand Mixer with Bowl Rest, Compact and Lightweight, 215 Watts of Peak Power, Storage Case, Black (62512) |
|
| 3 | Ninja Hand Mixer, Immersion Blender, Foodi Power Mixer System, 750-Peak-Watt Handheld Emulsion Blender & Electric Hand Mixer Combo With Whisk, Beaters & 3-Cup Blending Vessel,120 volts, Black CI101 |
|
| 4 | Hand Mixer Electric, 450W Kitchen Mixers with Scale Cup Storage Case, Turbo Boost/Self-Control Speed + 5 Speed + Eject Button + 5 Stainless Steel Accessories, For Easy Whipping Dough,Cream,Cake |
|
| 5 | Hand Mixer Electric, 400W Food Mixer 5 Speeds Handheld Blender, 5 Stainless Steel Accessories, Storage Box, Kitchen Blender with Cord for Cream, Cookies, Dishwasher Safe, White |
|
| 6 | Hand Mixer Attachments Beater 6Pcs, Whisk, Blending Rod and Dough Hooks, Stainless Steel Hand Mixer Accessories for Kitchenaid Hand Mixers KHM3 KHM5 KHM7 KHM9, Dishwasher Safe |
|
| 7 | Cuisinart HM-90BCS Power Advantage Plus 9-Speed Handheld Mixer with Storage Case, Brushed Chrome |
|
| 8 | KitchenAid 9-Speed Digital Hand Mixer with Turbo Beater II Accessories and Pro Whisk - Contour Silver |
|
| 9 | bella 3.5 Qt Hand & Stand Mixer, 2 in 1 Electric Mixer with Bowl, Dough Hook, Whisk & Egg Beater, Multifunctional Handheld Blender & Mixer for Baking, 200 Watt, Surf |
|
| 10 | KitchenAid 5 Ultra Power Speed Hand Mixer - KHM512, Matte Black |
|
Corded vs. Cordless: Which Path to Choose?
This is a major consideration. A corded mixer offers consistent, uninterrupted power. You never have to worry about a battery dying mid-mix. The only downside is being tethered to an outlet. A cordless mixer offers incredible freedom and flexibility, but they are often less powerful and more expensive. For the best value on a budget, a corded model is almost always the superior choice.
Your First Mix: A Beginner’s Guide to Using Your Hand Mixer
Got your new mixer? Awesome! Let’s get you mixing like a pro without any beginner mishaps.
- Insert the Attachments: Before plugging it in, insert the beaters or other attachments. They should click securely into place. Most mixers have a designated slot for each beater.
- Choose the Right Bowl: Use a deep, high-sided bowl to contain splatters. This simple choice will save you a lot of cleanup time.
- Start Low and Slow: Place the beaters fully into your ingredients before turning the mixer on. Always, always, always start on the lowest speed to combine the ingredients without creating a mess.
- Gradually Increase Speed: Once the dry and wet ingredients are incorporated, you can slowly ramp up the speed to what the recipe calls for.
- Keep it Moving: Don’t just hold the mixer in one spot. Move it around the bowl in a circular motion, ensuring you scrape the sides and bottom periodically with a spatula to get an even mix.
- Power Down Before Removing: Turn the mixer off completely before lifting the beaters out of the bowl. This will prevent a final, dramatic flick of batter across your countertop.
Pro Tips to Maximize Your Mixer’s Potential
Ready to level up? I’ve learned a few things over years of mixing that can make a huge difference.
- Room Temperature is Key: For the creamiest buttercreams and smoothest cake batters, make sure your butter and eggs are at room temperature. A cold block of butter will make even the best mixer struggle.
- Don’t Overmix: This is especially important for cakes, muffins, and pancakes. Once the flour is just combined, stop. Overmixing develops gluten, which can lead to tough, dense baked goods.
- Chill Your Bowl and Beaters: When making whipped cream, pop your metal bowl and beaters in the freezer for 15 minutes beforehand. The cold helps the cream whip up faster and hold its shape longer.
- Mashed Potato Magic: For the fluffiest mashed potatoes ever, use your hand mixer. After boiling and draining your potatoes, add your butter and milk and mix on a low speed until you reach your desired consistency.
“For beginners, a hand mixer with a soft-start feature is a lifesaver. It prevents that initial ‘flour explosion’ we’ve all experienced. It’s a small detail that makes a world of difference in your confidence and cleanliness,” says renowned pastry chef Isabella Chen.
Hand Mixer vs. Stand Mixer vs. Whisk: What’s the Difference?
Wondering if a hand mixer is the right choice for you? It all depends on your needs, space, and budget.
| Feature | Hand Mixer | Stand Mixer | Manual Whisk |
|---|---|---|---|
| Best For | Quick, everyday tasks; small to medium batches. | Large batches, heavy doughs, hands-free mixing. | Small, quick tasks like scrambling eggs. |
| Cost | $ (Budget-friendly) | $$$ (Significant investment) | $ (Very cheap) |
| Storage | Compact, fits in a drawer or cupboard. | Bulky, requires significant counter or cabinet space. | Fits in a utensil drawer. |
| Effort | Minimal effort. | Hands-free, virtually no effort. | High physical effort. |
| Cleanup | Easy; just eject and wash the attachments. | More complex; bowl and multiple attachments. | Very easy to clean. |
For most home bakers, the best budget hand mixer offers the perfect balance of power, convenience, and affordability.
Keeping It Clean: How to Properly Care for Your Hand Mixer
A little care goes a long way in extending the life of your appliance.
- Unplug First: Always unplug the mixer before cleaning. Safety first!
- Eject Attachments: Press the eject button and remove the beaters, whisk, or dough hooks. These are almost always dishwasher-safe (check your manual), but a quick wash in warm, soapy water works just as well.
- Wipe the Body: Use a damp cloth to wipe down the main body of the mixer. Never submerge the motor housing in water.
- Clean the Vents: Use a small brush or a toothpick to gently clear any dried batter out of the motor vents to prevent overheating.
- Store Smart: Wrap the cord loosely around the mixer body and store it, along with its attachments, in its original box or a dedicated drawer to keep everything together.
Frequently Asked Questions
Q: How many watts is good for a hand mixer?
A: For most home baking and cooking tasks, a hand mixer with 200-250 watts is perfectly sufficient. This provides enough power for everything from whipping cream to mixing dense cookie dough without the motor straining.
Q: Can a hand mixer knead bread dough?
A: Yes, but with limitations. A hand mixer equipped with dough hooks can handle small batches of soft doughs, like for dinner rolls or pizza. For stiffer, larger batches of bread dough, a stand mixer is a much better tool.
Q: What is the most important feature in a budget hand mixer?
A: A true low speed or a “soft start” feature is arguably the most important. It gives you control, prevents messes, and allows you to gently combine ingredients before ramping up the power, which is crucial for many recipes.
Q: How do I stop my hand mixer from splattering everywhere?
A: Always use a deep, high-sided bowl. More importantly, make sure the beaters are fully submerged in the ingredients before you turn the mixer on, and always start on the very lowest speed setting.
Q: Is it worth getting a hand mixer with a storage case?
A: Absolutely! A storage case or clip-on container is a fantastic feature, especially for a budget model. It keeps all your attachments and the cord neatly organized, so you never have to hunt for a missing beater again.
Your Perfect Baking Partner Awaits
Finding the best budget hand mixer isn’t about chasing the flashiest model; it’s about identifying the core features that will genuinely improve your time in the kitchen. With the right power, a good range of speeds, and the essential attachments, you’ll have a reliable partner for countless delicious creations. It proves that you don’t need to spend a fortune to equip your kitchen with tools that bring joy and deliver incredible results. Now, go forth and bake with confidence! We’d love to hear about your own experiences and favorite hand mixer models in the comments below.