There’s nothing quite like that sinking feeling. You’re halfway through whipping up a perfect meringue, flour dusting your apron, sugar sparkling on the countertop, and suddenly… silence. Your trusty sidekick, the hand mixer, has given up the ghost. When your Hand Mixer Not Working is the only thing standing between you and a delicious batch of cookies, it can feel like a kitchen catastrophe. But don’t reach for the whisk just yet! More often than not, the issue is something you can fix yourself in just a few minutes.
I’ve spent years in the kitchen, taking these little powerhouses apart and putting them back together, and I can tell you that they are surprisingly resilient. Before you declare it dead and start shopping for a new one, let’s walk through a simple troubleshooting process. We’ll get to the bottom of this and, hopefully, get you back to baking in no time.
Why Is My Hand Mixer Not Working? A Troubleshooting Checklist
When a hand mixer not working brings your baking to a halt, run through these common culprits first. Start with the simplest solutions and work your way down the list. You might be surprised by how often the fix is incredibly simple.
1. Check the Power Source (The “Is It Plugged In?” Moment)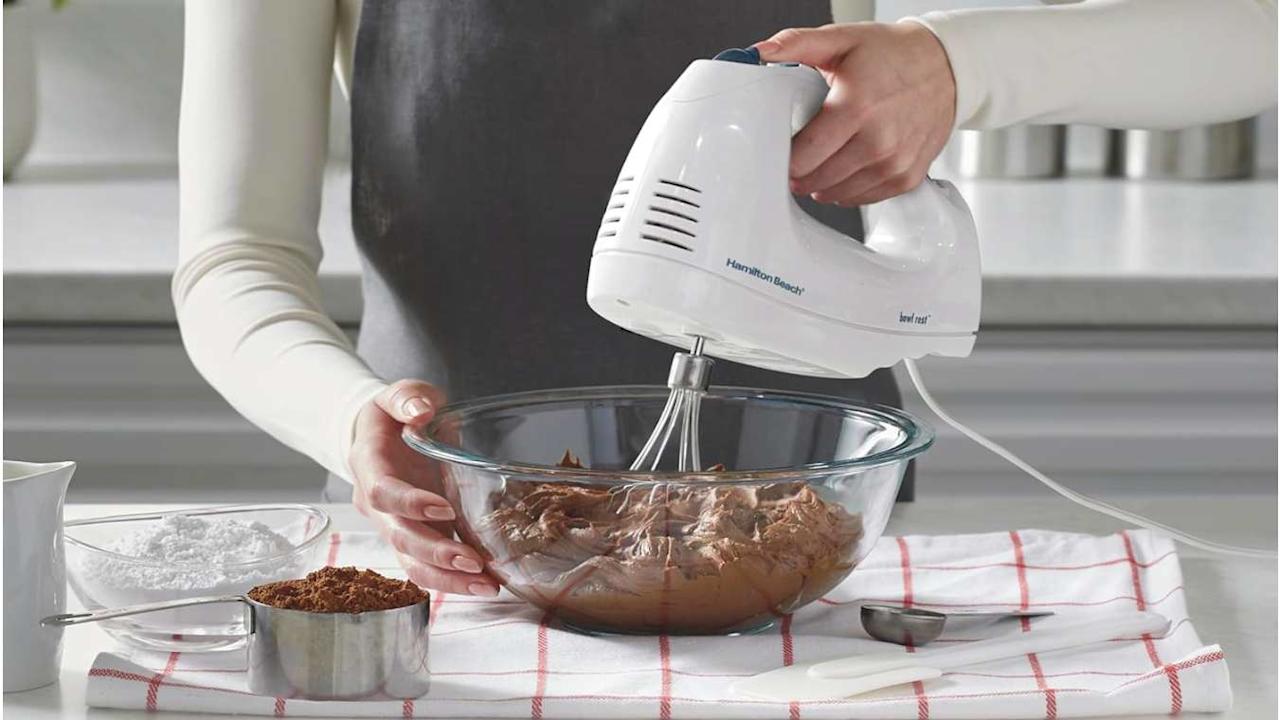
This might sound ridiculously obvious, but you’d be amazed how often it’s the root cause. We’ve all done it.
- Is it firmly plugged in? Jiggle the plug in the socket to make sure it has a solid connection.
- Does the outlet work? Unplug the mixer and plug in something you know works, like a phone charger or a lamp. If that device doesn’t work either, you’ve found your problem: a tripped circuit breaker or a faulty outlet. Head to your fuse box and see if any breakers need to be reset.
- Try a different outlet. Sometimes, a single outlet can fail. Moving the mixer to another socket is a quick and easy test.
2. Inspect the Power Cord
The cord is the lifeline of your mixer, and it takes a lot of abuse from being wrapped, twisted, and stored.
- Look for visible damage. Carefully run your hands along the entire length of the cord. Are there any cuts, frays, or exposed wires? Is the area where the cord enters the mixer housing cracked or stressed?
- If you see damage, stop immediately. A damaged cord is a serious fire and shock hazard. Repairing a power cord is a job for a professional, and in most cases, it’s safer and more cost-effective to replace the mixer.
3. Let It Cool Down (The Overheating Issue)
Hand mixer motors are small but mighty, and they can get hot, especially when tackling a thick dough like a heavy-duty cookie batter.
- Does the mixer feel hot to the touch? Most modern hand mixers have a built-in thermal overload protector. This is a safety feature that automatically shuts the motor off to prevent it from burning out.
- Give it a break. Unplug the mixer and let it sit on the counter for at least 20-30 minutes to cool down completely. Once it’s cool, try plugging it in and turning it on again. If it works, you know overheating was the issue. To prevent this, try not to run your mixer continuously for more than 5-7 minutes at a time on heavy tasks.
4. Check the Beaters and Ejector Button
Sometimes the issue isn’t the motor at all, but the mechanical parts that hold the beaters.
- Are the beaters fully inserted? Remove the beaters and re-insert them, making sure you hear a solid “click.” If they aren’t seated properly, a safety mechanism might prevent the mixer from starting.
- Is the ejector button stuck? Press the ejector button a few times. If it feels gummy or stuck, food debris might be jamming the mechanism. Unplug the mixer and use a toothpick or a small brush to gently clean around the button and the beater sockets.
Expert Tip: Pastry Chef Antoine Dubois once told me, “Your hand mixer is like a marathon runner, not a sprinter. Pushing it too hard through a stiff dough is the fastest way to burn it out. If the motor is straining, give it a 30-second rest. Your mixer and your dessert will thank you.”
If you’ve gone through this entire checklist and your hand mixer not working is still a mystery, the problem might be more serious, like a worn-out motor or a failed internal switch. At this point, unless you’re comfortable with small appliance repair, it may be time to consider a replacement.
The Ultimate Guide to Your Next Hand Mixer
Whether you’ve successfully revived your old friend or are in the market for a new one, understanding what makes a great hand mixer is key. This little gadget has a surprisingly rich history, evolving from a clunky, hand-cranked device in the late 19th century to the sleek, powerful tool we know today. Let’s break down what really matters.
Key Features to Consider When Buying a Hand Mixer
Choosing a hand mixer isn’t just about picking a color. The engine under the hood makes all the difference.
- Power (Wattage): This is a measure of the motor’s strength. For light tasks like whipping cream or egg whites, 200-250 watts is fine. But if you plan on mixing cookie dough or bread dough, look for a model with 300 watts or more. A more powerful motor is less likely to strain and overheat.
- Speed Settings: Look for a mixer with at least 5 speeds, and more importantly, a slow-start feature. This prevents ingredients from flying out of the bowl when you first turn it on. It’s a game-changer for keeping your kitchen clean.
- Attachments: The standard beaters are great, but many models come with extra tools that expand their utility.
- Whisks: Ideal for aerating egg whites and cream.
- Dough Hooks: Essential for kneading small batches of bread or pizza dough.
- Blending Rods: Turn your hand mixer into a mini immersion blender for smoothies or soups.
- Corded vs. Cordless: Cordless models offer incredible freedom of movement but often have less power and a limited battery life. Corded models provide consistent, reliable power and are generally more robust for tougher jobs. Your choice depends on convenience versus raw power.
|
Our Picks for the Best Hand Mixer in 2025
As an Amazon Associate, we earn from qualifying purchases.
|
||
| Num | Product | Action |
|---|---|---|
| 1 | Hand Mixer Electric Mixing Bowls Set, 5 Speeds Handheld Mixer with 4 Nesting Stainless Steel Mixing Bowl, Measuring Cups Spoons 200W Kitchen Blender Whisk Beater Baking Supplies For Beginner |

|
| 2 | Hand Mixer Electric, 450W Kitchen Mixers with Scale Cup Storage Case, Turbo Boost/Self-Control Speed + 5 Speed + Eject Button + 5 Stainless Steel Accessories, For Easy Whipping Dough,Cream,Cake |
|
| 3 | KitchenAid 5 Ultra Power Speed Hand Mixer - KHM512, Matte Black |
|
| 4 | Ninja Hand Mixer, Immersion Blender, Foodi Power Mixer System, 750-Peak-Watt Handheld Emulsion Blender & Electric Hand Mixer Combo With Whisk, Beaters & 3-Cup Blending Vessel,120 volts, Black CI101 |
|
| 5 | KitchenAid 9-Speed Digital Hand Mixer with Turbo Beater II Accessories and Pro Whisk - Contour Silver |
|
| 6 | Hand Mixer Attachments Beater 6Pcs, Whisk, Blending Rod and Dough Hooks, Stainless Steel Hand Mixer Accessories for Kitchenaid Hand Mixers KHM3 KHM5 KHM7 KHM9, Dishwasher Safe |
|
| 7 | bella 3.5 Qt Hand & Stand Mixer, 2 in 1 Electric Mixer with Bowl, Dough Hook, Whisk & Egg Beater, Multifunctional Handheld Blender & Mixer for Baking, 200 Watt, Surf |
|
| 8 | Cuisinart HM-90BCS Power Advantage Plus 9-Speed Handheld Mixer with Storage Case, Brushed Chrome |
|
| 9 | Hand Mixer Electric, 400W Food Mixer 5 Speeds Handheld Blender, 5 Stainless Steel Accessories, Storage Box, Kitchen Blender with Cord for Cream, Cookies, Dishwasher Safe, White |
|
| 10 | Proctor Silex Easy Mix 5-Speed Electric Hand Mixer with Bowl Rest, Compact and Lightweight, 215 Watts of Peak Power, Storage Case, Black (62512) |
|
How to Use a Hand Mixer Like a Pro: A Beginner’s Guide
Getting the most out of your hand mixer is easy if you follow a few simple steps.
- Choose the Right Bowl: Use a deep, high-sided bowl to contain splatters. Glass or metal bowls are generally better than plastic, which can hold onto grease and prevent egg whites from whipping properly.
- Insert the Attachments First: Always make sure the mixer is unplugged before inserting or ejecting beaters.
- Start Low, Go Slow: Place the beaters into your ingredients before turning the mixer on. Start at the lowest speed to combine everything without making a mess, then gradually increase the speed as needed.
- Keep it Moving: Don’t just hold the mixer in one spot. Move it around the bowl in a circular motion, ensuring all ingredients are evenly incorporated. Occasionally stop and scrape down the sides of the bowl with a spatula.
- Clean Up: Eject the beaters over the sink, and most are dishwasher safe (check your manual!). Wipe down the body of the mixer with a damp cloth, making sure never to submerge the motor housing in water.
Hand Mixer vs. Stand Mixer vs. Whisk: Which One Do You Need?
It’s a classic kitchen showdown. Each tool has its place, and the best one depends on the job at hand.
Hand Mixer
- Best For: Quick, everyday tasks like whipping cream, beating eggs, mixing cake batter, and making cookie dough.
- Pros: Compact, affordable, easy to store, and quick to clean.
- Cons: Requires you to hold it, less powerful for very heavy doughs, can be tiring for long mixing jobs.
Stand Mixer
- Best For: Large batches, heavy doughs (bread, pasta), and hands-free mixing for extended periods.
- Pros: Very powerful, hands-free operation, larger capacity, multiple attachments available.
- Cons: Expensive, bulky, takes up significant counter space, more effort to clean.
Whisk
- Best For: Small, delicate tasks where you need maximum control, like emulsifying a vinaigrette or gently folding in ingredients.
- Pros: Inexpensive, no electricity needed, offers a great feel for the texture of your mixture.
- Cons: Requires significant arm strength and time for tasks like whipping cream.
For the vast majority of home bakers, a high-quality hand mixer is the most versatile and practical choice, striking the perfect balance between power, convenience, and cost.
Frequently Asked Questions (FAQ)
Q1: How do I know if my hand mixer motor is burned out?
A burned-out motor will often have a distinct, sharp electrical or burning smell. You might also hear a grinding noise or see sparks inside the motor housing. If you notice any of these signs, unplug the mixer immediately as it is no longer safe to use.
Q2: Can I use my hand mixer for bread dough?
Yes, but with caution. If your hand mixer comes with dough hooks and has a powerful motor (300W+), it can handle small, soft doughs. However, for dense, large batches, a stand mixer is a much better tool to avoid a hand mixer not working due to motor strain.
Q3: Why are my beaters hitting each other?
If your beaters are clanking together, they are likely either bent or inserted into the wrong sockets. Most hand mixers have a specific socket for each beater, often marked with a small symbol. Try swapping them. If they are bent, it’s best to replace them.
Q4: How long should a hand mixer last?
With proper care and average use, a good quality hand mixer can last for 5 to 10 years, and sometimes even longer. Avoiding overheating and cleaning it properly after each use are the best ways to extend its lifespan.
Q5: Is it worth repairing a hand mixer?
For most common hand mixers, the cost of professional repair (parts and labor) is often close to or even more than the price of a brand new one. Unless it’s a very expensive or sentimental model, replacement is usually the more economical option when faced with a major issue like a dead motor.
Conclusion: Your Reliable Kitchen Partner
A hand mixer is one of the most hardworking and valuable tools in any home cook’s arsenal. When you find your hand mixer not working, it can be a frustrating setback, but as we’ve seen, the solution is often within your grasp. By following a simple troubleshooting checklist, you can diagnose common problems and get back to your recipe. And by understanding what makes a great mixer—from motor power to a slow-start function—you can choose a new model with confidence or learn to use your current one more effectively. Treat it well, don’t push it past its limits, and it will be your reliable partner for countless delicious creations to come.