Hello, fellow kitchen enthusiast! Have you ever stared at a beautiful bread recipe, only to be put off by the thought of ten minutes of intense, arm-aching kneading? I’ve been there. You dream of that fresh, crusty loaf, but the reality of a flour-dusted counter and sticky hands feels like a workout you didn’t sign up for. But what if I told you a secret weapon might already be hiding in your kitchen cabinet? Today, we’re going to unlock its potential. Let’s talk about How To Use Dough Hooks On A Hand Mixer, a skill that can turn your compact appliance into a surprisingly mighty bread-making partner.
It’s a common question I get: “Can my little hand mixer really handle dough?” The answer is a resounding yes—if you know the right way to do it. Forget thinking of your hand mixer as just a tool for whipping cream and egg whites. With those funny-looking spiral attachments, you’re just a few steps away from creating light brioche, chewy pizza bases, and soft dinner rolls with a fraction of the effort. This guide will walk you through everything, from the basics to pro-tips that will make you feel like a seasoned baker.
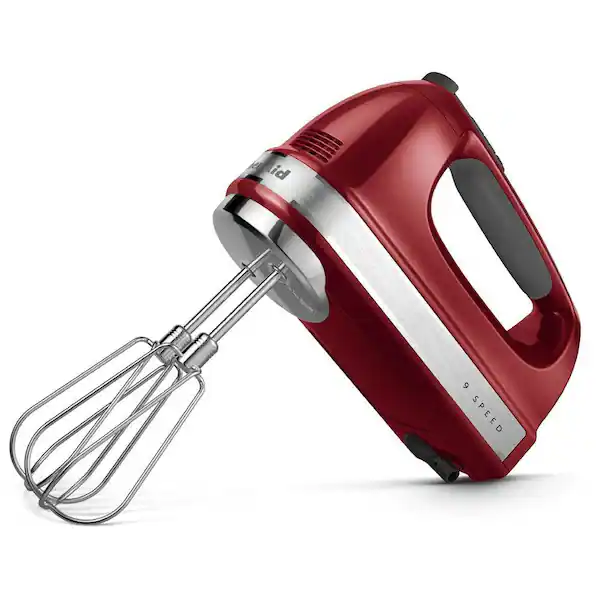
What Exactly Are Dough Hooks and How Do They Work?
First things first, let’s get acquainted with our tools. Standard beaters are designed to incorporate air, making things light and fluffy. Dough hooks, on the other hand, are the muscle. They typically come in a C-shape or a spiral, corkscrew design. Their job isn’t to whip; it’s to mimic the push-and-fold motion of hand-kneading.
Think of it this way: as the two hooks rotate, they catch a section of the dough, pull it, stretch it, and then fold it back into the mass. This continuous motion develops the gluten strands in your flour. Gluten is what gives bread its structure and that satisfyingly chewy texture. Without proper kneading, you end up with a dense, crumbly loaf. So, in essence, dough hooks are your automated kneading assistants.
Can Every Hand Mixer Handle Dough? The Power Question
This is the million-dollar question, and the answer is crucial to avoid a kitchen catastrophe (namely, a burnt-out motor). Not all hand mixers are created equal when it comes to tackling dough.
As Pastry Chef Isabelle Dubois, a frequent contributor to Kitchen Gadget Monthly, often says, “Using an underpowered mixer for dough is like trying to tow a car with a bicycle. The intent is there, but the equipment will fail.”
Here’s what to look for to determine if your mixer is up to the task:
- Motor Power (Wattage): This is the most important factor. For light doughs, you need a mixer with at least 250-300 watts of power. Anything less is primarily for batters and liquids. For heavier doughs like whole wheat, you’ll want something even more powerful, inching closer to the 350-400 watt range. Check the bottom of your mixer or the original manual for this info.
- A Slow Start Feature: Dough is heavy. A mixer that blasts off at high speed will not only send flour flying everywhere but will also put immense strain on the motor. A “slow start” or a very low first-speed setting is non-negotiable for kneading.
- Build Quality: Does your mixer feel sturdy or flimsy? A well-built machine with a solid feel is more likely to have the gearing and internal components to handle the resistance of a sticky dough ball.
If your mixer is a lightweight, low-wattage model, it’s best to stick to hand-kneading or consider an upgrade. Forcing it will only lead to a sad, smoky end for your trusty appliance.
A Step-by-Step Guide: How to Use Dough Hooks on a Hand Mixer
Alright, you’ve confirmed your mixer is ready for action. Let’s get our hands (and hooks) dirty! We’ll use a basic pizza dough as our example.
- Insert the Correct Dough Hooks. This might sound obvious, but many mixers have a specific socket for each hook. Often, one hook has a small “collar” or flange on its shaft. This one usually goes into the larger of the two holes. Check your user manual if you’re unsure—getting this right ensures they rotate correctly and don’t clash.
- Combine Your Ingredients First. Don’t just dump flour, water, yeast, and salt into a bowl and expect the mixer to figure it out. Use a spatula or wooden spoon to briefly mix the ingredients until a shaggy, rough dough forms. This initial step takes a lot of the initial strain off the motor and prevents a flour cloud from erupting in your kitchen.
- Start Low and Slow. Place your dough hooks into the center of the shaggy dough mass. Turn your mixer on to its lowest possible speed. Seriously, start at level one. The goal is to gently bring the dough together. You’ll see the hooks start to catch the dough and form it into a more cohesive ball.
- The Kneading Process. Once the dough comes together, you can increase the speed to low-medium (maybe a 2 or 3 on a 5-speed mixer). Now, the real work begins.
- Hold the mixer at a slight angle.
- Slowly move the mixer around the circumference of the bowl. This ensures all parts of the dough get worked evenly.
- The dough will start climbing up the hooks. This is normal! Just occasionally stop the mixer, scrape the dough back down with a spatula, and continue.
- How Long Should You Knead? This is where how to use dough hooks on a hand mixer becomes more of an art. For most basic bread or pizza doughs, you’ll need to knead for about 5-8 minutes. The motor of the hand mixer will get warm; this is normal, but if it gets excessively hot or smells like it’s burning, stop immediately and let it cool down.
- Know When to Stop: The Windowpane Test. How do you know when the gluten is perfectly developed? Use the classic baker’s “windowpane test.” Pinch off a small piece of dough. Gently stretch it between your fingers. If you can stretch it thin enough to see light through it without it tearing (like a windowpane), it’s ready! If it tears easily, it needs another minute or two of kneading.
- Finish by Hand (Optional but Recommended). A hand mixer does about 90% of the work. For the best results, I always like to turn the dough out onto a lightly floured surface and knead it by hand for just a minute. This allows you to feel the dough’s texture and form it into a smooth, perfect ball, ready for its first rise.
Pro Tips and Common Mistakes to Avoid
Mastering the basics is great, but these little tricks will elevate your dough game.
Common Mistakes
- Starting on High Speed: The number one mistake. You’ll get a face full of flour and a strained motor. Always start on low.
- Overloading the Mixer: Hand mixers are for small to medium batches. Don’t try to make a recipe that calls for 6 cups of flour. Stick to recipes using 3-4 cups at most.
- Not Using a Big Enough Bowl: Give your dough room to move. A deep, sturdy bowl is your best friend here. A lightweight plastic bowl might just spin around on your counter.
Pro Tips
- Scrape Down the Sides: Just like with cake batter, dough can stick to the sides of the bowl. Pause every couple of minutes to scrape everything back into the center.
- Listen to Your Motor: Your mixer will talk to you. If it starts to sound like it’s struggling or slowing down significantly, the dough might be too stiff. You can add a teaspoon of water to help. If it continues to struggle, it’s time to finish by hand.
- Keep the Vents Clear: Make sure your hand isn’t covering the motor’s air vents. It needs to breathe to stay cool!
Hand Mixer with Dough Hooks vs. Stand Mixer: Which is Right for You?
This is a classic kitchen debate. While a stand mixer is the undisputed heavyweight champion of bread making, a hand mixer with dough hooks is a surprisingly capable contender for the casual baker.
| Feature | Hand Mixer with Dough Hooks | Stand Mixer |
|---|---|---|
| Cost | Very affordable ($30 – $80) | Significant investment ($250+) |
| Batch Size | Small (1 loaf, 1 pizza) | Large (multiple loaves) |
| Power | Moderate | Very High |
| Convenience | Easy to store, quick setup | Heavy, takes up counter space |
| Best For | Casual bakers, small kitchens | Serious bread makers, large families |
Ultimately, if you bake bread once a week or more, a stand mixer is a worthy investment. But if you’re an occasional baker who wants to avoid hand-kneading, a powerful hand mixer is the perfect, space-saving solution.
How Do I Clean and Store My Dough Hooks?
Cleaning up is the least fun part, but it’s simple. The moment you’re done kneading, eject the hooks and drop them into a bowl of warm, soapy water. The sticky dough residue will dissolve, making them easy to wipe clean after a few minutes. Most dough hooks are dishwasher safe, but check your manual to be sure. Dry them completely before storing them with your mixer to prevent any rust.
Frequently Asked Questions (FAQ)
Q1: What kind of dough can I make with hand mixer dough hooks?
You can successfully make a variety of soft and moderately stiff doughs. Think pizza dough, soft dinner rolls, cinnamon buns, brioche, and basic white sandwich bread. Avoid very stiff, low-hydration doughs like bagels, which are best left to a stand mixer or hand-kneading.
Q2: My dough just keeps climbing up the hooks. What am I doing wrong?
You’re not doing anything wrong; this is perfectly normal behavior for dough! Simply stop the mixer, use a silicone spatula to push the dough back down into the bowl, and then continue mixing. It might happen several times during the kneading process.
Q3: Can I use a hand mixer for cookie dough?
Yes, but you should use the standard beaters, not the dough hooks. Dough hooks are for developing gluten in yeast breads. For cookie dough, the goal is to cream butter and sugar and combine ingredients, which is a job for the beaters.
Q4: How long does it take to knead dough with a hand mixer?
On average, it takes about 5-8 minutes on a low-to-medium speed. This is generally a bit longer than with a powerful stand mixer but significantly faster and less laborious than kneading by hand. Always use the windowpane test rather than relying strictly on time.
Q5: What’s the best hand mixer for making dough?
Look for a model from a reputable brand (like KitchenAid, Cuisinart, or Breville) that has at least 300 watts of power, a slow-start function, and a sturdy build. Reading reviews that specifically mention dough-making performance is also a great idea.
Your Baking Adventure Awaits
So there you have it. The secret to how to use dough hooks on a hand mixer isn’t a secret at all—it’s about understanding your tool’s capabilities and using the right technique. Your hand mixer is more versatile than you ever imagined. It’s a gateway to fresh, homemade bread without the commitment of a bulky, expensive stand mixer.
Now, go pull out that recipe you’ve been dreaming of. Armed with this knowledge, you can confidently tackle that dough and fill your home with the incredible aroma of baking bread. Happy kneading! I’d love to hear about your first bread-making success in the comments below.