Ever opened your kitchen drawer only to be met with a tangled mess of cords and beaters? You’re not alone. For many of us with limited kitchen space, bulky appliances can feel more like a burden than a blessing. If this sounds familiar, you’re probably wondering What Is A Compact Hand Mixer For Storage and if it’s the magical solution you’ve been searching for. The short answer is yes, it absolutely can be. It’s a game-changing tool designed for efficiency, power, and, most importantly, disappearing neatly when the job is done.
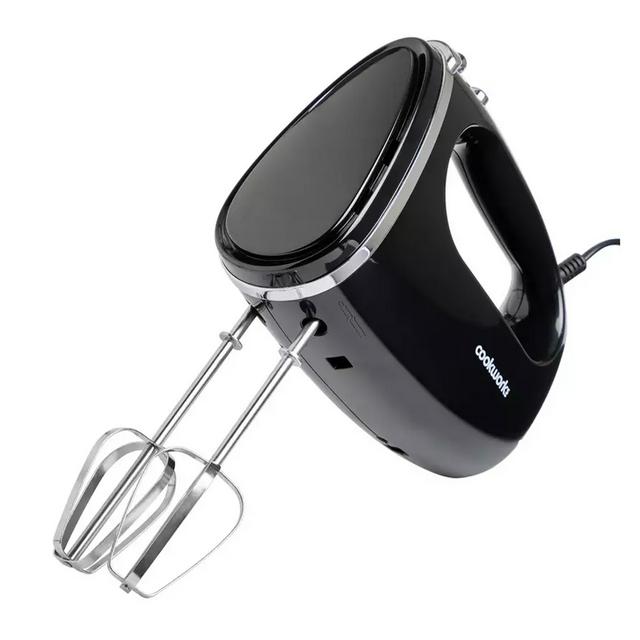
A compact hand mixer for storage is more than just a smaller version of a standard mixer. It’s a thoughtfully designed appliance where every component, from the beaters to the cord, has a designated place. These mixers often come with a snap-on storage case or integrated clips that hold all the accessories, transforming a chaotic jumble into a single, tidy unit. They are the perfect ally for home bakers in apartments, dorm rooms, or anyone who simply values an organized kitchen. Let’s dive into everything you need to know about these clever little powerhouses.
A Quick Stir Through History: The Evolution of the Hand Mixer
Before we get into the nitty-gritty of modern mixers, it’s fun to look back. The concept of mechanically mixing ingredients has been around since the mid-1800s with hand-cranked “egg beaters.” The first electric mixer was a behemoth, patented in the late 19th century and used mostly in commercial bakeries. It wasn’t until the early 20th century that these devices started shrinking for home use, but they were still a luxury. Fast forward to today, and we have an incredible array of options, from mighty stand mixers to the star of our show: the ingeniously designed compact hand mixer for storage. This evolution reflects our changing lifestyles—busier schedules and smaller living spaces demand tools that are both effective and easy to put away.
Key Features to Look For in a Compact Hand Mixer for Storage
So, you’re sold on the idea. But what separates a great compact mixer from a mediocre one? It’s all in the details. When you’re shopping, keep an eye out for these crucial features.
How Much Power Do I Really Need?
Don’t let the small size fool you; a good compact mixer packs a surprising punch. Power is measured in watts, but higher wattage doesn’t always equal better performance. Look for a mixer in the 200-250 watt range. This is the sweet spot for handling everything from whipping cream and egg whites to mixing cake batter and even tackling a light cookie dough.
As professional pastry chef Isabelle Dubois often says, “Consistent torque is more important than raw wattage. A well-engineered 220-watt mixer will outperform a poorly designed 300-watt one every time. Look for models with DC motors if you can—they’re quieter and more efficient.”
Speed Settings (and the Magic of Slow Start)
Variety is the spice of life, and in baking, it’s the key to perfect texture. A mixer with at least 5 speed settings gives you the control you need. You want a low speed for gently combining dry ingredients and a high speed for creating airy meringues.
The unsung hero here is the “slow start” feature. Trust me on this. It’s a lifesaver. This function prevents the mixer from jumping to full power immediately, which means no more clouds of flour puffing up into your face and all over your countertops. It’s a small feature that makes a huge difference in your baking experience.
Attachments and Onboard Storage: The Core of “Compact”
This is where a compact hand mixer for storage truly shines. The design is all about self-containment.
- Snap-On Case: The most common and effective solution. The mixer and all its accessories fit snugly into a plastic case that clips directly onto the bottom of the mixer itself. It creates one neat, rectangular block that’s easy to store on a shelf or in a deep drawer.
- Integrated Beater Clips: Some minimalist designs have small clips on the body of the mixer where the beaters can be secured. This is a great super-compact option, though it doesn’t usually account for the cord.
- Included Accessories: At a minimum, your mixer should come with two traditional beaters. Many also include a whisk for aeration (perfect for cream) and two dough hooks for kneading small batches of bread or pizza dough.
To Cord or Not to Cord: The Corded vs. Cordless Debate
The final big decision is whether to go with a traditional corded model or a modern cordless one.
- Corded Mixers:
- Pros: Consistent, uninterrupted power. You never have to worry about a battery dying mid-whip. They are also generally more powerful and less expensive.
- Cons: You’re tethered to an outlet, which can be limiting. The cord itself can be awkward and needs to be wrangled for storage.
- Cordless Mixers:
- Pros: Ultimate freedom! Mix anywhere in your kitchen without being tied to a wall. They are incredibly convenient and easy to handle.
- Cons: They run on a rechargeable battery, so you need to remember to charge them. They can be slightly less powerful and more expensive than their corded counterparts.
For a true compact hand mixer for storage, a corded model with a good snap-on case that includes a spot for the cord is often the most reliable and organized choice.
|
Our Picks for the Best Hand Mixer in 2025
As an Amazon Associate, we earn from qualifying purchases.
|
||
| Num | Product | Action |
|---|---|---|
| 1 | Hand Mixer Electric, 400W Food Mixer 5 Speeds Handheld Blender, 5 Stainless Steel Accessories, Storage Box, Kitchen Blender with Cord for Cream, Cookies, Dishwasher Safe, White |

|
| 2 | Proctor Silex Easy Mix 5-Speed Electric Hand Mixer with Bowl Rest, Compact and Lightweight, 215 Watts of Peak Power, Storage Case, Black (62512) |
|
| 3 | KitchenAid 5 Ultra Power Speed Hand Mixer - KHM512, Matte Black |
|
| 4 | KitchenAid 9-Speed Digital Hand Mixer with Turbo Beater II Accessories and Pro Whisk - Contour Silver |
|
| 5 | Cuisinart HM-90BCS Power Advantage Plus 9-Speed Handheld Mixer with Storage Case, Brushed Chrome |
|
| 6 | Ninja Hand Mixer, Immersion Blender, Foodi Power Mixer System, 750-Peak-Watt Handheld Emulsion Blender & Electric Hand Mixer Combo With Whisk, Beaters & 3-Cup Blending Vessel,120 volts, Black CI101 |
|
| 7 | bella 3.5 Qt Hand & Stand Mixer, 2 in 1 Electric Mixer with Bowl, Dough Hook, Whisk & Egg Beater, Multifunctional Handheld Blender & Mixer for Baking, 200 Watt, Surf |
|
| 8 | Hand Mixer Attachments Beater 6Pcs, Whisk, Blending Rod and Dough Hooks, Stainless Steel Hand Mixer Accessories for Kitchenaid Hand Mixers KHM3 KHM5 KHM7 KHM9, Dishwasher Safe |
|
| 9 | Hand Mixer Electric, 450W Kitchen Mixers with Scale Cup Storage Case, Turbo Boost/Self-Control Speed + 5 Speed + Eject Button + 5 Stainless Steel Accessories, For Easy Whipping Dough,Cream,Cake |
|
| 10 | Hand Mixer Electric Mixing Bowls Set, 5 Speeds Handheld Mixer with 4 Nesting Stainless Steel Mixing Bowl, Measuring Cups Spoons 200W Kitchen Blender Whisk Beater Baking Supplies For Beginner |
|
How to Use Your Compact Hand Mixer Like a Pro: A Beginner’s Guide
Got your new mixer? Awesome! Let’s get you started on the right foot. Using it is simple, but a few key steps will ensure perfect results every time.
- Choose the Right Attachment: Use traditional beaters for most tasks like cake batter and cookie dough. Grab the whisk for whipping cream or egg whites. Use dough hooks for, well, dough!
- Attach and Lock: Make sure the mixer is unplugged. Insert the beaters into the two holes until they click firmly into place. Give them a gentle tug to ensure they’re secure.
- Prep Your Bowl: Use a deep bowl with high sides. This is the best way to prevent splatters, no matter how careful you are.
- Start Low and Go Slow: Place the beaters into your ingredients before turning the mixer on. Start at the lowest speed to combine everything gently.
- Gradually Increase Speed: Once the ingredients are incorporated, you can slowly ramp up the speed to what the recipe calls for.
- Move It Around: Don’t just hold the mixer in one spot. Move it around the bowl in a circular motion to ensure everything is mixed evenly.
- Power Down Before Removing: Always turn the mixer off before lifting the beaters out of the bowl. This simple step will save you from a major cleanup job.
Pro Tips to Maximize Your Mixer’s Potential
Ready to level up? These simple tricks will make you feel like a seasoned baker.
- Temperature Matters: For the fluffiest whipped cream and stiffest meringue peaks, make sure your cream, egg whites, and even your bowl and beaters are well-chilled.
- Soften Your Butter: Don’t try to cream refrigerator-hard butter. Let it sit at room temperature for 30-60 minutes until it’s pliable. Your mixer’s motor will thank you.
- Scrape Down the Bowl: Periodically, stop the mixer and use a spatula to scrape down the sides and bottom of the bowl. This ensures there are no hidden pockets of unmixed ingredients.
- Don’t Overmix: This is especially important for things like muffin and pancake batter. Mix just until the ingredients are combined. Overmixing develops gluten and can lead to tough, dense results.
Hand Mixer vs. Stand Mixer vs. Whisk: Which One Do You Need?
It can be confusing to know which tool is right for the job. Here’s a simple breakdown to help you decide.
| Feature | Compact Hand Mixer | Stand Mixer | Hand Whisk |
|---|---|---|---|
| Best For | Everyday tasks, quick jobs, small to medium batches | Heavy-duty tasks, large batches, bread dough | Small, simple jobs like scrambling eggs |
| Storage | Excellent; designed to be compact and tidy | Poor; requires significant counter or cabinet space | Excellent; fits in any utensil drawer |
| Cost | $-$$ | $$$-$$$$ | $ |
| Effort Required | Low | None (hands-free operation) | High |
| Cleanup | Easy; just eject and wash the attachments | Moderate; bowl and attachment can be bulky | Easy; one simple tool to wash |
Essentially, a compact hand mixer for storage is the perfect middle ground. It offers far more power and efficiency than a manual whisk without the cost, size, and commitment of a full stand mixer.
Keeping It Clean: Proper Care and Maintenance
Taking care of your mixer is easy and will ensure it lasts for years.
- Eject and Wash: Always unplug the unit first. Eject the beaters or other attachments. Most are dishwasher safe (check your manual!), or you can simply wash them by hand with warm, soapy water.
- Wipe Down the Body: Use a damp cloth to wipe down the main body of the mixer. Never submerge the motorized unit in water.
- Store It Right: Once everything is clean and completely dry, pack it all away in its storage case. This protects it from dust and damage and keeps your kitchen tidy.
Frequently Asked Questions (FAQ)
Can a compact hand mixer handle thick bread dough?
For the most part, no. While they can handle very light, soft doughs with their dough hook attachments, they lack the power and stability to knead heavy bread dough. That’s a job best left for a stand mixer or your own two hands.
How much should I expect to spend on a good compact hand mixer for storage?
You can find excellent, reliable models from reputable brands for between $40 and $70. Premium or cordless models might cost a bit more, but you don’t need to break the bank to get a quality machine.
Is a snap-on storage case really necessary?
It’s not strictly necessary, but it is the defining feature that makes a mixer truly great for storage. It’s the difference between a tidy, grab-and-go appliance and a frustrating search for a missing beater in a cluttered drawer.
Are cordless hand mixers powerful enough for most tasks?
Yes, modern cordless models have come a long way. A good quality cordless mixer has more than enough power for common tasks like whipping cream, mixing cake batter, and making frosting. They might struggle a bit more with very dense cookie dough compared to their corded cousins.
What are the most important attachments to look for?
The absolute must-haves are the two standard beaters. A wire whisk attachment is a very close second, as it’s far superior for aerating liquids. Dough hooks are a nice bonus if you plan to make things like pizza dough or soft rolls.
Your Tidy Kitchen Awaits
So, what is a compact hand mixer for storage? It’s your secret weapon for creating delicious baked goods without sacrificing precious kitchen real estate. It’s the perfect blend of power, convenience, and clever design, proving that great things really do come in small, well-organized packages. By choosing a model with the right power, versatile speeds, and a fantastic all-in-one storage system, you’re not just buying an appliance; you’re investing in a clutter-free, more enjoyable baking experience. Now, go forth and mix with confidence! We’d love to hear about your own experiences with finding the perfect mixer.