Ever found yourself in a sticky situation—literally? Picture this: you’ve just whipped up the most divine buttercream frosting. Your beaters are coated in a thick, sugary concoction. You try to pull them out, and it’s a wrestling match. Your fingers get messy, the beaters clatter onto the counter, and you think, “There has to be a better way.” Well, there is. Let me introduce you to your new best friend in the kitchen: the What Is The Beater Ejector Lever. This small, often overlooked button is the secret to clean, effortless, and safe baking, transforming your hand mixer from a useful tool into an indispensable ally.
So, What Is the Beater Ejector Lever and How Does It Work?
The beater ejector lever (or button, as it often is) is a simple mechanical feature on a hand mixer designed for one crucial job: to release the beaters or other attachments from the mixer’s body with a single press. It’s the magic button that saves you from a sticky mess.
Think of it as an ‘eject’ button for your baking adventures. Internally, when you push the beaters into the mixer, they click into a spring-loaded locking mechanism. This holds them securely in place, even when you’re powering through a thick cookie dough. When you press the ejector lever, it applies force to this mechanism, disengaging the lock and popping the beaters right out. No pulling, no twisting, no frosting-covered fingers. It’s a clean, one-handed operation that makes cleanup a breeze.
Why This Tiny Lever is a Total Game-Changer
It might seem like a minor feature, but trust me, a good beater ejector lever is a non-negotiable for any serious home baker. Here’s why it’s so important:
- Hygiene and Cleanliness: This is the big one. Instead of getting your hands all over the batter-coated beaters, you can eject them directly into the sink or a bowl of soapy water. It keeps your hands and your countertop cleaner.
- Safety First: Trying to yank out stubborn beaters, especially if the mixer is still accidentally plugged in, can be a hazard. The ejector button provides a safe, controlled way to remove the attachments.
- Convenience and Speed: When you’re in the middle of a recipe and need to switch from beaters to dough hooks, you don’t want to waste time fumbling around. A quick press of the button and you’re ready for the next step.
- Prevents Damage: Forcibly pulling on the beaters can, over time, wear out the locking mechanism inside the mixer. Using the ejector lever is the proper way to remove them and helps prolong the life of your appliance.
A Brief History of the Hand Mixer: From Arm Power to Electric Power
Before we had these nifty gadgets, baking was a serious workout. Cooks relied on manual rotary egg beaters, which were patented back in the 1850s. While revolutionary for their time, they still required a ton of elbow grease.
The real revolution came with the electric stand mixer in the early 20th century, but these were bulky and expensive. The first true, portable electric hand mixer was patented by Stephen Poplawski in 1922 (the same man who invented the blender!). However, it was companies like Sunbeam with their Mixmaster line in the 1930s and 40s that truly brought the convenience of electric mixing to the average home. Early models were heavy and basic, but as technology evolved, they became lighter, more powerful, and packed with features we now take for granted—like multiple speeds and, of course, the glorious beater ejector lever.
How to Choose the Perfect Hand Mixer: Key Features to Consider
Walking into an appliance store or browsing online can be overwhelming. So many models! So many promises! Let’s break down what really matters when you’re on the hunt for a new hand mixer.
Power (Watts)
Wattage is a measure of the motor’s power. While a higher wattage generally means a more powerful mixer, it’s not the only factor. A well-designed motor with 200-250 watts is often more than enough for most tasks, from whipping cream to mixing cake batter. If you plan on tackling heavy-duty tasks like kneading bread dough, look for something in the 300+ watt range with a robust motor design.
Speed Settings
Variety is key here. Look for a mixer with at least 5 speed settings. What’s even more important is a “slow-start” feature. This prevents a “flour cloud” explosion by starting the beaters slowly and gradually ramping up to your desired speed.
As professional pastry chef Danielle Carter puts it, “A slow-start feature is a lifesaver. It’s the difference between a clean kitchen and spending ten minutes wiping flour off your cabinets. For beginners, it’s the single most valuable feature to look for.”
Attachments
Most hand mixers come with a standard pair of beaters. These are your workhorses for cakes, cookies, and frosting. However, many models offer more:
- Whisks: A single, large balloon whisk is fantastic for aerating egg whites for meringues or whipping cream to fluffy peaks.
- Dough Hooks: These C- or J-shaped hooks are for kneading bread or pizza dough. They are a must-have if you’re a bread baker without a stand mixer.
- Storage Case: Many models now come with a snap-on case that holds the mixer and all its attachments. It’s a brilliant feature for keeping your kitchen cupboards organized.
Corded vs. Cordless
This is a modern debate.
- Corded: Generally more powerful, lighter, and you never have to worry about the battery dying mid-mix. The downside is being tethered to an outlet.
- Cordless: Offers incredible freedom and flexibility. Perfect for small kitchens or if your outlets are in awkward places. The trade-offs are a heavier body (due to the battery) and the need to keep it charged.
|
Our Picks for the Best Hand Mixer in 2025
As an Amazon Associate, we earn from qualifying purchases.
|
||
| Num | Product | Action |
|---|---|---|
| 1 | KitchenAid 5 Ultra Power Speed Hand Mixer - KHM512, Matte Black |

|
| 2 | Hand Mixer Electric, 450W Kitchen Mixers with Scale Cup Storage Case, Turbo Boost/Self-Control Speed + 5 Speed + Eject Button + 5 Stainless Steel Accessories, For Easy Whipping Dough,Cream,Cake |
|
| 3 | Cuisinart HM-90BCS Power Advantage Plus 9-Speed Handheld Mixer with Storage Case, Brushed Chrome |
|
| 4 | KitchenAid 9-Speed Digital Hand Mixer with Turbo Beater II Accessories and Pro Whisk - Contour Silver |
|
| 5 | bella 3.5 Qt Hand & Stand Mixer, 2 in 1 Electric Mixer with Bowl, Dough Hook, Whisk & Egg Beater, Multifunctional Handheld Blender & Mixer for Baking, 200 Watt, Surf |
|
| 6 | Ninja Hand Mixer, Immersion Blender, Foodi Power Mixer System, 750-Peak-Watt Handheld Emulsion Blender & Electric Hand Mixer Combo With Whisk, Beaters & 3-Cup Blending Vessel,120 volts, Black CI101 |
|
| 7 | Hand Mixer Attachments Beater 6Pcs, Whisk, Blending Rod and Dough Hooks, Stainless Steel Hand Mixer Accessories for Kitchenaid Hand Mixers KHM3 KHM5 KHM7 KHM9, Dishwasher Safe |
|
| 8 | Hand Mixer Electric, 400W Food Mixer 5 Speeds Handheld Blender, 5 Stainless Steel Accessories, Storage Box, Kitchen Blender with Cord for Cream, Cookies, Dishwasher Safe, White |
|
| 9 | Hand Mixer Electric Mixing Bowls Set, 5 Speeds Handheld Mixer with 4 Nesting Stainless Steel Mixing Bowl, Measuring Cups Spoons 200W Kitchen Blender Whisk Beater Baking Supplies For Beginner |
|
| 10 | Proctor Silex Easy Mix 5-Speed Electric Hand Mixer with Bowl Rest, Compact and Lightweight, 215 Watts of Peak Power, Storage Case, Black (62512) |
|
How to Use Your Hand Mixer: A Beginner’s Guide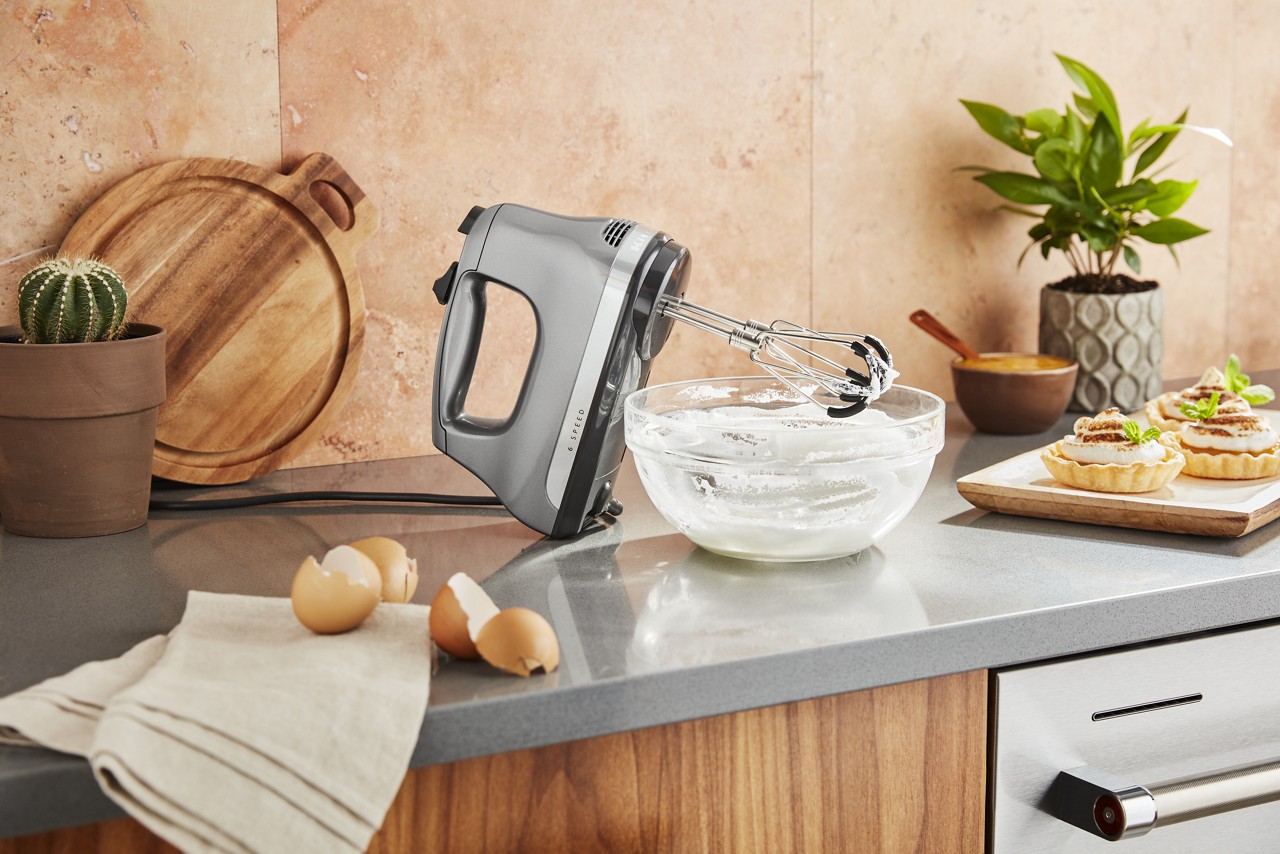
Got your new mixer? Awesome! Let’s get you mixing like a pro in five simple steps.
- Insert the Attachments: Before plugging it in, insert the correct beaters. Most mixers have a specific socket for each beater (often indicated by a small collar or symbol). You’ll hear a distinct ‘click’ when they are securely in place.
- Plug It In and Prep Your Bowl: Place your ingredients in a deep, high-sided bowl to minimize splatters. Plug in the mixer.
- Start Low and Slow: Immerse the beaters into the ingredients before you turn the mixer on. Start at the lowest speed to combine everything without making a mess.
- Ramp Up the Speed: Once the ingredients are incorporated, gradually increase the speed to what the recipe calls for. Move the mixer around the bowl to ensure everything is mixed evenly.
- Eject and Clean: Once you’re done, turn the mixer off and unplug it. Hold the mixer over the bowl or sink and press the beater ejector lever. The beaters will drop out cleanly.
Hand Mixer vs. Stand Mixer vs. Whisk: Which Tool for the Job?
Each of these kitchen tools has its place. Knowing when to use which will make you a more efficient and effective baker.
| Feature | Hand Mixer | Stand Mixer | Manual Whisk |
|---|---|---|---|
| Best For | Quick jobs: cake batter, cookies, whipped cream, frosting. | Heavy-duty jobs: bread dough, large batches, stiff cookie dough. | Small jobs: scrambling eggs, mixing a vinaigrette, small amounts of cream. |
| Price | $20 – $100 | $200 – $700+ | $5 – $20 |
| Storage | Compact, fits in a drawer or cupboard. | Bulky, requires significant counter or cabinet space. | Very small, fits in a utensil crock or drawer. |
| Effort | Low effort, requires holding and moving. | Hands-free operation. | High effort, requires manual whisking. |
| Cleanup | Easy; just the beaters and bowl. | More complex; bowl, attachment, and splash guard. | Very easy; just the whisk. |
Keeping Your Hand Mixer in Top Shape: Cleaning and Storage
Proper care will ensure your hand mixer lasts for years. It’s simple!
- Attachments: Eject the beaters, dough hooks, or whisk immediately after use. Most are dishwasher-safe (check your manual!), but a quick wash in hot, soapy water is just as effective.
- The Mixer Body: Never submerge the mixer body in water. It contains the motor and electrical components. Simply wipe it down with a damp cloth to remove any splatters. Use a toothpick or a small brush to clean out any gunk from the ventilation slots.
- The Cord: Wipe the cord down and wrap it loosely for storage. Wrapping it too tightly around the mixer can strain the connection point over time.
- Storage: If you have a storage case, use it! It keeps everything together and dust-free. If not, designate a specific spot in a drawer or cupboard for the mixer and its parts.
Frequently Asked Questions (FAQ)
Q1: Can I use a hand mixer to knead bread dough?
Yes, you can, provided your mixer has dough hooks and a powerful enough motor (ideally 300+ watts). It’s great for smaller batches of soft dough. For very stiff or large batches, a stand mixer is still the better choice to avoid burning out the motor.
Q2: My beaters are stuck! What do I do if the beater ejector lever isn’t working?
First, ensure the mixer is unplugged. Sometimes, dried batter can act like glue. Try wiggling the beaters gently while holding the beater ejector lever down. If that doesn’t work, a tiny drop of cooking oil at the insertion point might help lubricate it. If it’s a persistent problem, the internal mechanism may need servicing.
Q3: What’s the difference between standard beaters and wire beaters?
Standard beaters (often called twisted wire beaters or turbobeaters) are excellent all-rounders for thick batters and doughs. Thinner wire beaters or whisks are designed to incorporate more air, making them ideal for light, airy tasks like whipping egg whites and cream.
Q4: How do I prevent ingredients from splattering everywhere?
Three key tips: use a deep bowl, start with the beaters submerged in the ingredients, and always use the slow-start feature or lowest speed setting to begin mixing before ramping up.
Q5: Is a more expensive hand mixer really better?
Often, yes. A higher price tag usually gets you a more powerful and durable motor, better build quality, more useful speed settings (like a very slow start), and higher-quality attachments. For someone who bakes occasionally, a basic model is fine. But for frequent bakers, investing in a quality machine pays off in performance and longevity.
Your Kitchen’s Unsung Hero
So, there you have it. The humble hand mixer, with its incredibly useful beater ejector lever, is more than just a gadget; it’s a gateway to easier, cleaner, and more enjoyable baking. It’s the perfect middle ground between the arm-breaking labor of a whisk and the heavy-duty commitment of a stand mixer. By understanding its features and how to use it properly, you can unlock a world of culinary creativity. Now, go forth and whip up something wonderful! We’d love to hear about your own hand mixer triumphs and tribulations in the comments below.